In this tutorial, we outline the process of adding a new IP address in WHM.
Follow these steps to successfully add a new IP address:
-
Log in to WHM.
-
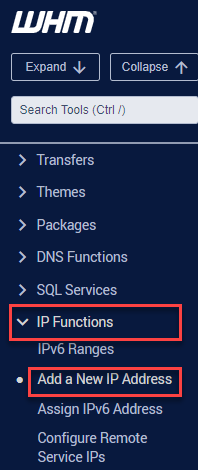
Go to the "IP Functions" section and select the "Add a new IP address" choice.
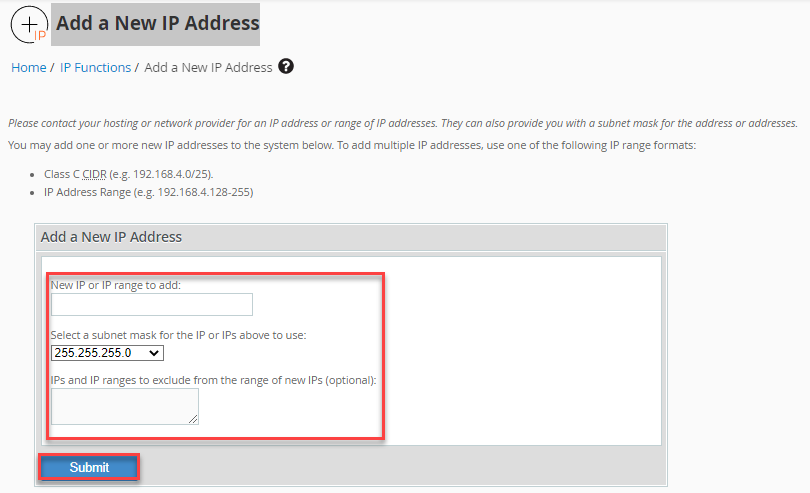
Upon entering the new page, provide the following details:
-
New IP or IP range to add: Input the desired IP addresses in this field.
-
Select a subnet mask for the IP or IPs above to use: Utilize the drop-down menu to choose the subnet mask for the specified IP or IPs.
-
IPs and IP ranges to exclude from the range of new IPs (optional): If there are specific IPs you wish to exclude from the new range, enter them in this optional text box.
-
Click the “Submit” button to proceed.
Note: The system automatically attempts to create an alias for the newly added IP address within the main network. This process involves reconstructing the IP address pool located in the /etc/ipaddrpool file, with IP addresses being stored in the /etc/ips file. The activation of IP addresses occurs when the server initiates the ipaliases service.
By following these steps, you can successfully add a new IP address in WHM. We hope you found our article helpful. For additional help, don't hesitate to contact our specialized support team.
Spread the love!