A well-known database for all kinds of developers is a MySQL database. It’s open source and provides the perfect balance between speed and features. In this knowledgebase, you will learn how to install phpMyAdmin in CentOS 7 – the best tool for managing your MySQL database. Your VPS will appreciate an extra utility.
PhpMyAdmin is necessary if you are not willing to work with command line that is the native tool for accessing MySQL. The command line has never been accessible to everyone at any given time and can be difficult for beginners if there is no GUI – graphical user interface. PhpMyAdmin supports a wide range of operations on MySQL as well as MariaDB.
Reasons To Use Phpmyadmin
Once phpMyAdmin has been installed on CentOS 7, you get a new browser interface which is more intuitive than using the command line. This web interface enables you perform such common operations like table management, column management, database management, relationship administration user management among others and also use it to run SQL statements directly.
To increase adoption of phpMyAdmin, it has been translated into 72 different languages, supporting both RTL (right-to-left) and LTR (left-to-right) languages.
Other Features of phpMyAdmin:
· It permits the display of multiple results that are in sets by means of stored procedures and queries.
· The feature also enables you to create, browse, edit, drop tables, databases, columns, views and indexes.
· In addition to that, it enables you to create/copy/drop/rename/alter tables/databases/columns/indexes.
· It also aids in maintaining the server, tables and databases with suggestions on server configuration.
· You can upload text files onto tables with this.
How to Install phpMyAdmin on CentOS 7?
The following are the steps to install phpMyAdmin on CentOS 7:
1. Go to Your VPS
Before you begin, connect your PC to the VPS server via SSH.
2. Set Up an Apache Web Server
The first thing to do before installing phpMyAdmin is creating an Apache web server. So, use this command in your own virtual private server running CentOS 7:
yum install httpd -y
Find out apache status using below command:
systemctl status httpd
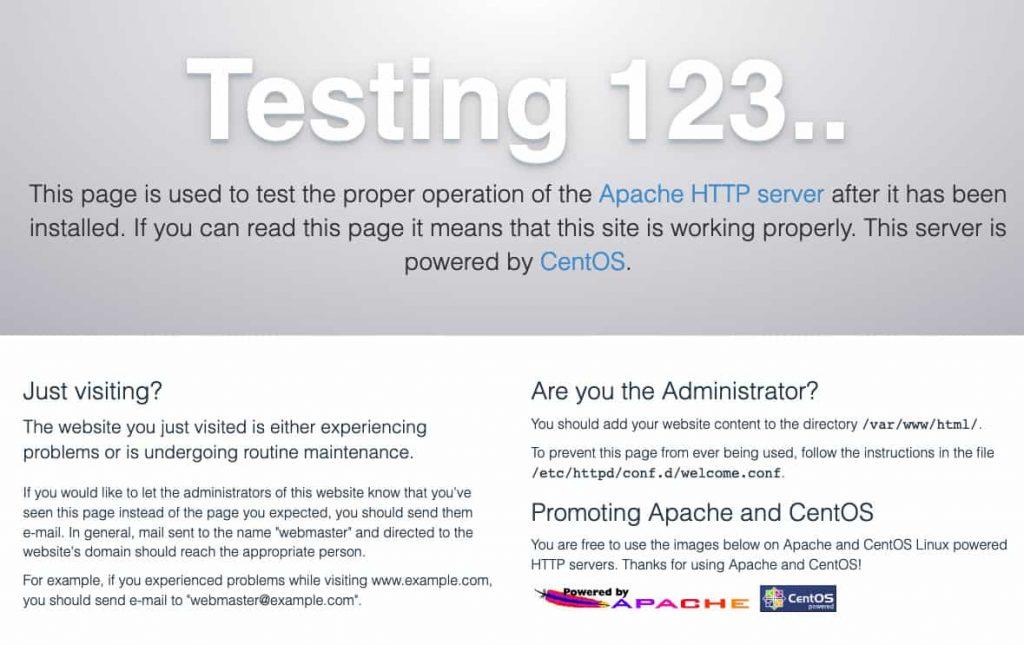
Finally, check if Apache is working by navigating the IP address of the server in a web browser; The below splash screen will indicate that it is up and running:
3. Set up the EPEL Repository
One can find phpMyAdmin in the EPEL repository (Extra Packages for Enterprise Linux). One has to install epel-release, a peculiar package for accessing EPEL.
To install epel-release on your CentOS, use this command:
sudo yum install epel-release
Hence, feel free to go ahead and install phpMyAdmin on CentOS 7 now that EPEL repo is already available.
4. Install phpMyAdmin on CentOS 7
Run the following command to do so:
sudo yum install phpmyadmin
Once installation is done, you will need to configure some things about it.
5. Configure the phpMyAdmin.conf File
Via editing of this file, you’ll be able to use phpMyAdmin remotely. Using vim editor open the file namedphpMyAdmin.conflocated at /etc/httpd/conf.d/ directory:
vim /etc/httpd/conf.d/phpMyAdmin.conf
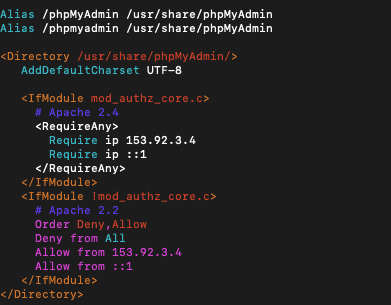
Here are four examples of require ip strings with long IPs. Its default value is 127.0.0.1; Change it to the IP address of the machine you are connecting to PhpMyAdmin such as 192.168.xxx.yyy. Check your IP using the Whats MyIP tool or another similar service.
Click the escape button and type: wq to save and close the file. Below is an example of such a configuration file named phpMyAdmin’s. Here, there are four different require ip strings corresponding to the IP length. The default is 127.0.0.1.
You must replace this value with the IP of the machine you use to access phpMyAdmin. You can use a tool like WhatsMyIP to check your IP. Then hit escape and type: wq to save the file and exit.
See an example of the phpMyAdmin’s file below:
6. Restart Apache Web Server
Now, restart the Apache web server by entering the below command in the command line. systemctl restarts httpd
7. Check if phpMyAdmin is Running
Lastly, add the IP address of your server in the string /phpmyadmin to the address bar of the browser and open phpMyAdmin utility like – 127.0.0.1/phpmyadmin. You will see login screen.
8. Find your phpMyAdmin username and password
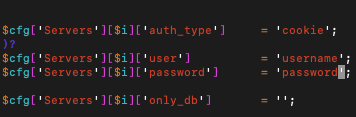
Check your username and password in the config.inc.php file. You will find the file in the phpMyAdmin installation directory. Here is /etc/phpMyAdmin. Open the file with the vim editor: vim configuration.inc.php
In this case, you can enter a username and password, as shown in the screenshot below.
Then, as before, click esc and :wq to save and exit the file.
Conclusion:
You can finally log into your phpMyAdmin! You have completed phpMyAdmin installation on CentOS 7 . Once logged in, you’ll see a simple dashboard that’s familiar to anyone who uses shared or cloud hosting.
phpMyAdmin is easy to use and behaves as a perfect solution for many business database needs. No database admin experience is required to work with phpMyAdmin and thus, it is very popular.
Welcome to using your phpMyAdmin!