This guide explains how to blacklist a domain using Plesk. Blacklisting a domain involves leveraging the built-in spam filtering system to block unwanted emails from reaching your inbox. While the system filters out most spam, activating the blacklist function further prevents future messages from a specific email system.
Blacklisting is a robust tool for effectively filtering spam emails originating from a server.
How to Blacklist Domains:
-
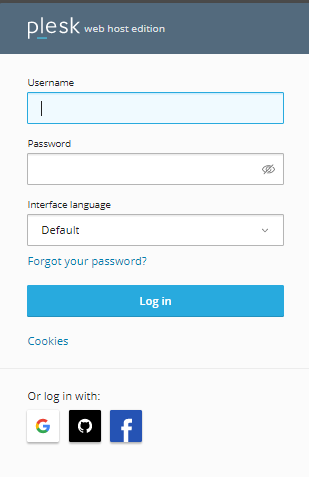
Sign in to Plesk.
-
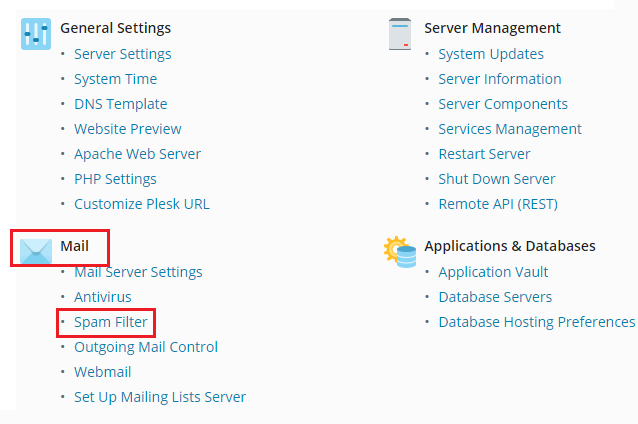
Choose "Tools and Settings" in the left menu.

-
Scroll to the "Mail" section and click on "Spam Filter."
-
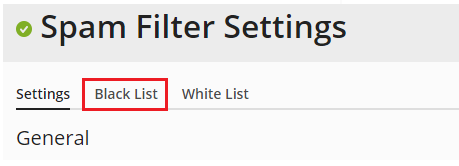
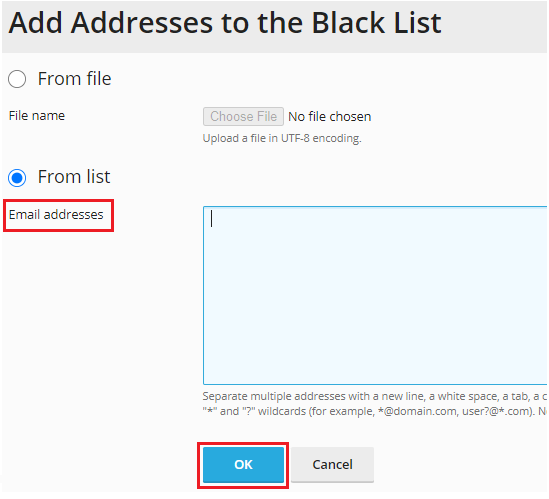
Choose the "Black List" option at the top of the screen, and click on the "Add Domain" icon displayed on the screen.
-
List the email addresses you want to blacklist, separating multiple addresses with a comma, space, or newline.
-
Click the "Ok" button.
-
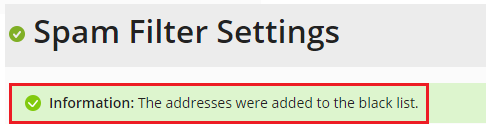
You will receive a notification confirming that the addresses have been added.