Att bemästra konsten att delegera är en viktig ledarskapsförmåga. Överväg att förse tekniskt kunniga användare som är värdar på din server med ett CyberPanel-användarkonto, vilket ger dem möjlighet att övervaka sina rådata och databaser.
Att ge användare möjligheten att hantera CyberPanel-användare blir särskilt fördelaktigt om de ger sig in i att sälja webbhotellsutrymme vidare, vilket gör att du kan koncentrera dig på att effektivt hantera din Linux-server.
Följande avsnitt kommer att vägleda dig om hur du effektivt hanterar CyberPanel-användare och deras behörigheter.
Skapa användare i CyberPanel
Detta segment förklarar processen att skapa admin-, återförsäljar- och vanliga användarkonton.
-
Logga in på CyberPanel.
-
Till vänster, välj Användare > Skapa ny användare.
-
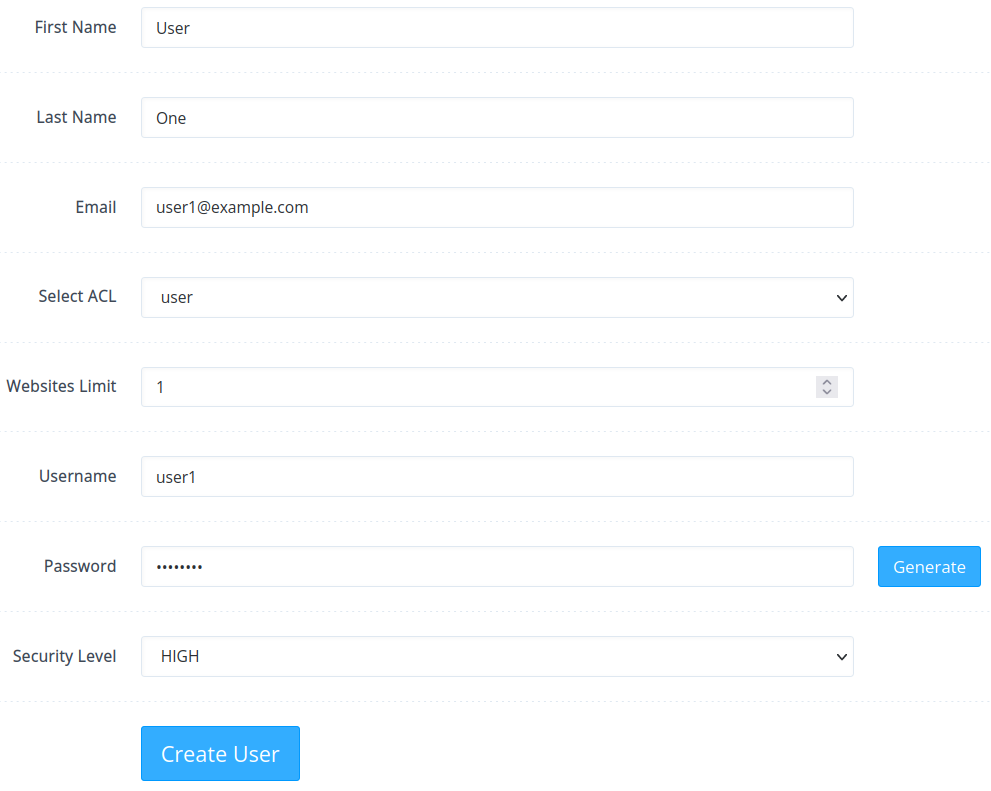
Ange ett namn, e-postkonto och välj en Access Control List (ACL)-förinställning. Standardalternativen inkluderar admin, återförsäljare eller användare.
-
Definiera en rimlig webbplatsgräns för användaren, med möjlighet att ändra den senare. Observera att denna variabel inte påverkar användare med "användare" ACL, eftersom de inte kan skapa CyberPanel-hanterade webbplatser.
-
Ange ett användarnamn och lösenord. Det är lämpligt att behålla säkerhetsnivån som "hög".
-
Klicka på "Skapa användare".
Lista CyberPanel-användare
För att komma åt en lista över alla CyberPanel-användare, gå till Användare > Lista användare. Tabellen kommer att visa:
-
Användarnamn
-
Webbplatsgräns
-
Aktuell diskutrymme
-
Användartyp
-
Ägare (admin-användare eller en återförsäljare)
-
Status (aktiv eller inaktiv)
-
Alternativ för kontosuspension/aktivering, redigering eller borttagning

Ändra användarinställningar
När din lista över användare utökas kan du stöta på situationer där det blir nödvändigt att överföra ägandet av användarkonton till andra privilegierade användare. Använd knappen "Lista användare > Redigera" för att ändra användarkontot på följande sätt:
-
Ändra ägaren till en annan användare
-
Justera Access Control List (ACL) mellan admin, återförsäljare, användare och anpassade ACL:er
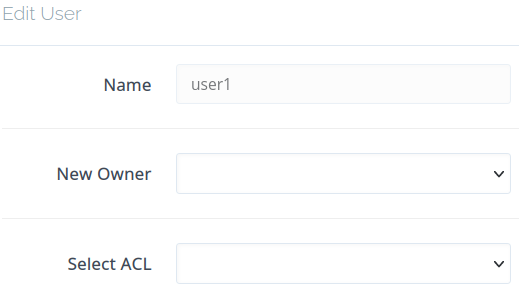
Ändringar träder i kraft omedelbart.
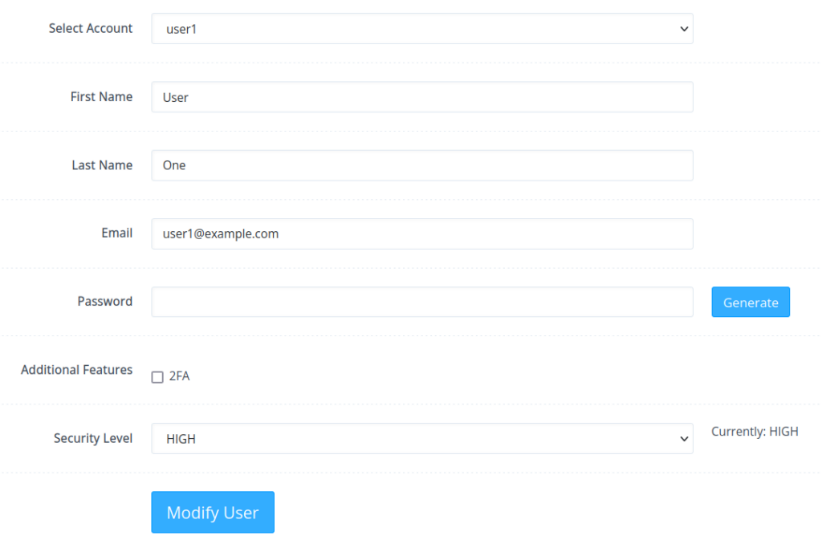
För att ändra olika användarinställningar, inklusive att aktivera tvåfaktorautentisering (2FA/TFA), gå till Användare > Ändra användare och välj en CyberPanel-användare från rullgardinsmenyn. Se till att välja "Ändra användare" längst ner för att spara ändringarna.
Ändra webbplatsgräns i återförsäljarcenter
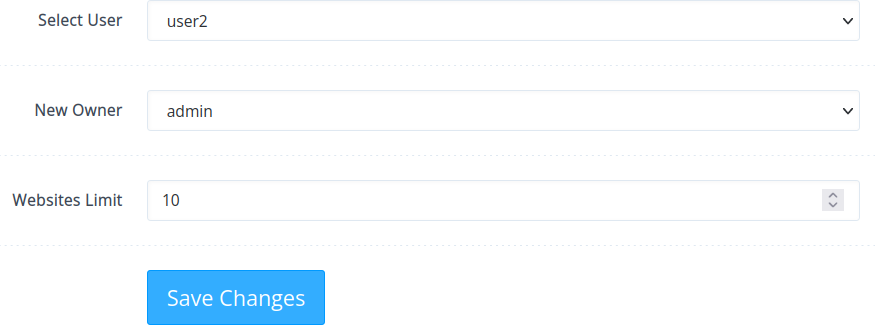
De återstående funktionerna som ska ändras är användarkontots ägare och webbplatsgränser. För att göra ändringar, gå till Användare > Återförsäljarcenter från sidofältet.
Välj en användare från rullgardinsmenyn och ställ sedan in den nya ägaren och webbplatsgränsen innan du väljer Spara ändringar.
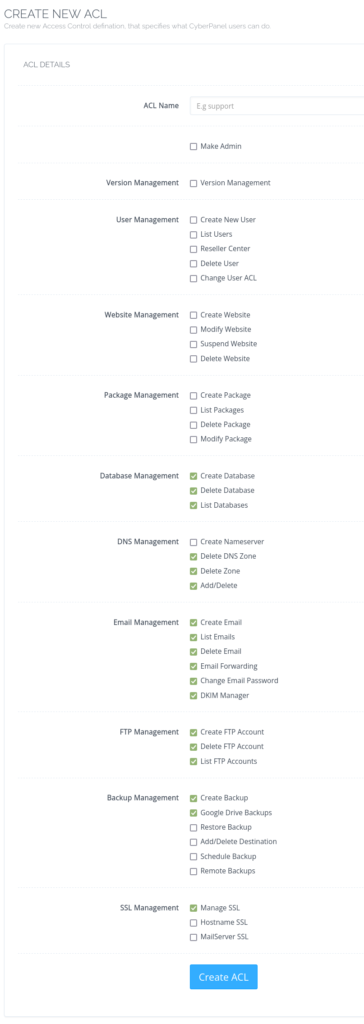
Hantera Access Control Lists (ACL:er)
Admin-, återförsäljar- och användar-ACL:erna är icke-modifierbara och icke-raderbara. Om användare behöver en personlig uppsättning privilegier kan du upprätta anpassade förinställningar genom att navigera till Användare > Skapa ny ACL.
Ange ett ACL-namn, markera kryssrutorna för de önskade funktionerna och klicka på Skapa ACL.
Ta bort ACL:er
För att ta bort en anpassad ACL:
-
Gå till sidofältet och välj Användare > Ta bort ACL.
-
Välj ACL från rullgardinsmenyn.
-
Bekräfta borttagningen genom att välja "Ta bort ACL" och bekräfta med "Är du säker?
Ändra ACL:er
För att redigera en anpassad ACL:
-
Navigera till sidofältet och klicka på Användare > Ändra ACL.
-
Välj en ACL från rullgardinsmenyn.
-
Gör de nödvändiga ändringarna.
-
Längst ner, klicka på "Spara ändringar".